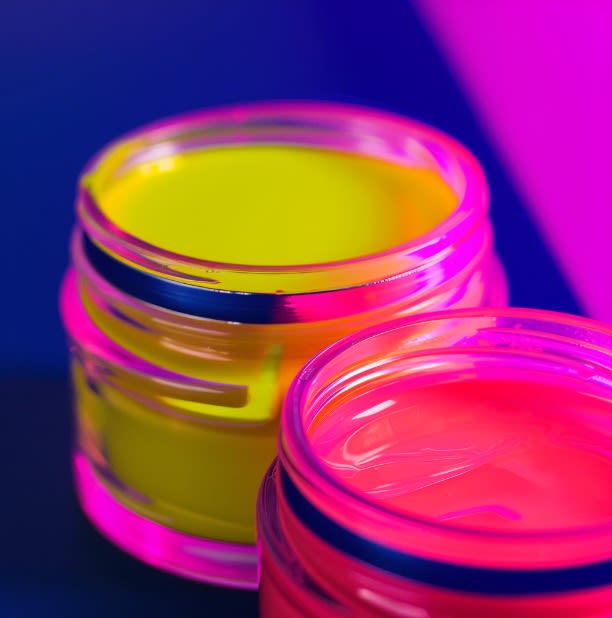
Direct answer: UV-reactive and neon-style murals need two plans: how it looks in normal light, and how it reads under blacklight. Start with a strong daytime design, then add UV accents as a second layer.

Quick takeaways
- Design for daylight first; UV is the bonus layer.
- Test the actual paint under the actual blacklight fixtures.
- Use UV accents for edges, highlights, and focal points.
- Protect the wall with a compatible finish if it’s high-traffic.
Neon signs have a way of grabbing our attention, don't they? There's something about those bright colors that just pulls us in. Maybe it reminds you of late nights at your favorite diner or strolling down a bustling city street. Whatever it is, neon signs are having a moment. But here's the thing - you don't need to shell out big bucks or be an electrician to get that neon look. With some paint and a bit of creativity, you can make your own neon-style sign right at home. Ready to give it a shot?
What You'll Need
Let's start with the basics. Here's your shopping list:
-
Neon-colored acrylic paints (the brighter, the better!)
-
A few different sized brushes
-
A canvas or wooden board (make sure it's primed)
-
Pencil and eraser (for when inspiration strikes... or mistakes happen)
-
Neon paint markers (trust me, these are game-changers)
-
Painter's tape (your new best friend)
-
A ruler (because eyeballing it only gets you so far)
-
UV blacklight (optional, but oh so cool for that extra glow)
Getting Started
1. Dream It Up
First things first - what do you want your sign to say? Keep it simple. Neon signs aren't usually novels, after all. Sketch out your idea lightly on your canvas. Remember, we're going for bold and clear here. Think less "War and Peace" and more "Eat at Joe's."
2. Tape It Off
Now, grab that painter's tape and start marking off where you want your "neon tubes" to be. This is where your ruler comes in handy. Straight lines are your friend here - unless you're going for that "I made this sign after a few too many" look.
3. White Out
Before you break out the neon, paint a white base coat where your colors will go. It's like primer for your sign. Let it dry completely. Maybe grab a coffee while you wait?
4. Time to Glow
Here's where the magic happens. Start painting those neon colors! But here's a pro tip: patience is key. Several thin layers will look way better than one thick, goopy mess. Let each layer dry before you add the next. Yes, it takes time. No, you can't rush art.
5. Make It Pop
Want to really sell that neon illusion? Use a slightly lighter shade of your neon color to add a thin line along one edge of your "tubes." It'll look like it's actually glowing. Blend it out gently - we're going for a subtle effect, not a paint explosion.
6. Get Detailed
Once everything's dry, break out those neon paint markers. Use them to sharpen up your edges and add any fine details. It's like putting on makeup - it's all about enhancing what's already there.
7. The Big Reveal
Carefully peel off that painter's tape. Moment of truth! Don't worry if it's not perfect - you can always touch up any bleed-through with some white paint. It's like Photoshop, but in real life.
8. Seal the Deal
To protect your masterpiece (and make those colors really sing), give it a coat of clear acrylic sealer. It's like hairspray for your art.
Want to take it to the next level?
Shine a UV blacklight on your creation and watch it come to life. It's like magic, only you're the magician.
Some Friendly Advice
-
New to this? Practice on some scrap material first. It's like warming up before the big game.
-
Splurge a little on good paints. Your future self will thank you.
-
Take your time. Rome wasn't built in a day, and neither is a great neon sign.
-
Don't be afraid to mix it up. Create your own custom colors. Who knows? You might invent the next big thing in neon.
So, there you have it. Your very own guide to bringing a bit of that neon magic into your home. Whether you're jazzing up your space, making a killer gift, or just want to try something new, you've got this. Now go forth and glow up your world!
Remember, the best part about DIY projects like this? There's no right or wrong way to do it. It's all about having fun and expressing yourself. So don't stress if it's not perfect - that's what gives it character. Happy painting!
UV Neon Paints are specially designed to react to Ultra Violet (UV) Black light.
— Glomania, UV Black Light Neon Visible Paint, Source
Project checklist
- Daylight design approved
- Blacklight plan (fixtures + viewing distance)
- UV paint test swatches (dry + under UV)
- Layer plan (base mural, then UV accents)
- Protection plan (cleaning + durability)
FAQ
Do UV paints glow without blacklight?
Many UV-reactive paints need UV/blacklight to fluoresce. Always test your specific paint system.
Can UV accents be added later?
Usually yes—if the wall is clean and the paint system is compatible. It’s often a great “phase 2” upgrade.
Want help with a mural in the Bay Area?
If you want a recommendation for your wall (surface prep, paint system, timeline), send photos and rough dimensions and we’ll help you scope it.
Related reads
- Essential Guide to Painting Industrial Signs in the Bay Area: Safety and Efficiency Tips
- Negative Space In Mural Art The Secret Ingredient You Didnt Know You Needed
